DayNight Schedule
Overview
The DayNight Schedule screen is where you set the schedule for the DayNight Groups. You can set a permanent schedule as well as override periods where the schedule may need to be modified based on the current needs of your organization.
Group Selection
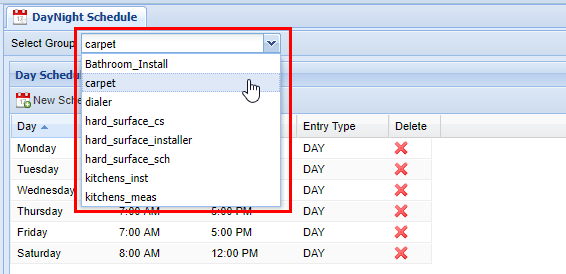
Before modifying any DayNight Schedule, you must select a DayNight group from the top left of the screen.
Adding a Day Schedule
2) Choose a DayNight Group to modify (see Group Selection)
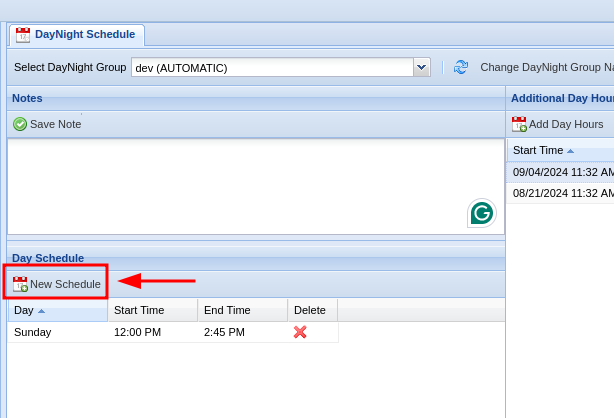
3) To add a Day Schedule start by clicking New Schedule within the Day Schedule tab. You can also click on a pre-existing day if you are modifying the permanent Day Schedule.
4) A row editor will appear in the grid with several options.
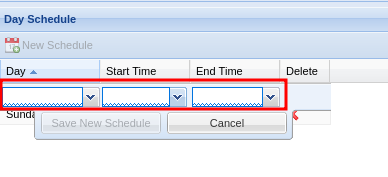
5) Select the appropriate day (each day must be set individually), start time, and end time.
6) After you are finished editing, click Save New Schedule. If the changes have been saved successfully you will see a green message saying Changes Saved. Repeat the previous steps to add additional days.
Removing a Day Schedule
2) Find the correct date to remove, and click on the red X under the Delete column.
3) A confirmation pop-up will appear. If you wish to delete, click OK. You will see a message stating Changes Saved. If this is not the entry to wish to delete click Cancel.
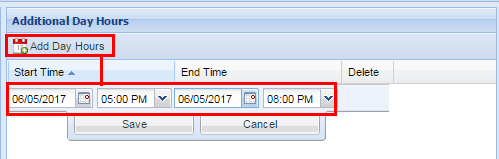
Adding Additional Day Hours
2) Find the Additional Day Hours panel located in the middle of the screen.
3) Click "Add Day Hours" and fill out the start date and time, and the end date and time.
If you need to have multiple days of additional hours at specific times (versus all day) you will need to make multiple entries, one for each day.
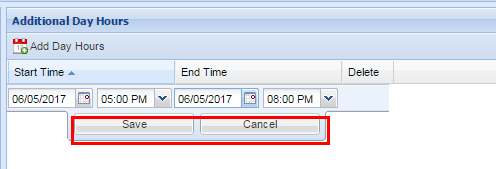
4) Click "Save" to add the entry.
Adding Additional Night Hours
Adding Additional Night Hours is performed the same way as adding Additional Day Hours except that you use the Additional Night Hours panel.

2) Find the Additional Night Hours panel located on the right of the screen.
3) Click "Add Night Hours" and fill out the start date and time, and the end date and time.
If you need to have multiple days of additional hours at specific times (versus all day) you will need to make multiple entries, one for each day.
4) Click "Save" to add the entry.
Example
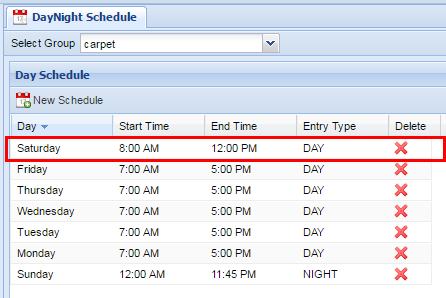
Let's say we have a permanent day schedule of Monday through Friday 7:00 AM to 5:00 PM. An event is coming up requiring the selected DayNight Group to stay extra on Wednesday and Thursday for 2 hours, from 5:00 PM to 7:00PM. To accomplish this you will have to make two entries, one for each date. The reason for this is if you set a start time for additional hours of Wednesday at 5:00 PM through Thursday at 7:00 PM the entire range of defined hours will indicate that the DayNight Group is in Day Mode. If the phones are configured to receive calls in Day Mode they can potentially receive calls during hours that were not intended to be received (e.g. between 7:00 PM through 7:00 AM the next morning)
After you have ensured that have selected the correct range of hours, click Save. If the changes are successful a message will appear at the top stating Changes Saved.
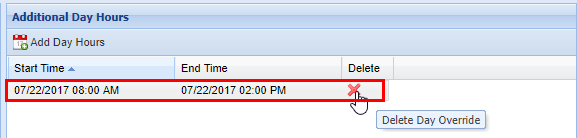
Removing Additional Day or Night Hours
2) Find the Additional Day Hours entry or Additional Night Hours entry that you wish to remove.


3) From the Additional Day Hours or Additional Night Hours panel click the red X in the Delete column.
4) A confirmation pop-up will appear confirming your selection. If you wish to delete, click OK. You will see a message stating Changes Saved. If this is not the entry to wish to delete, click Cancel.
No comments to display
No comments to display