Row Editor
This page includes specifics on modifying data within the individual screens in the web portal.
Rows
Rows are the individual points of data that you can modify, view, or both. Within rows, there may be various options for editing the data, as well as dynamic or view-only options as well.


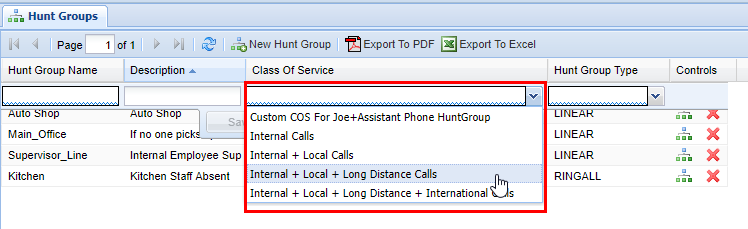
Drop Down Menu
When an option has multiple fixed values available, this will typically be displayed as a drop-down menu as shown below. To access the drop simply click on the box itself.
Fill Form
A fill form is a form where you enter the data yourself, depending on the form there may be no restrictions to space and characters, whereas others may require no spaces or special characters.
Checkboxes
Check boxes represent values that are essentially a yes or no (true or false) value. You simply click on the check box to check it or un-check it.

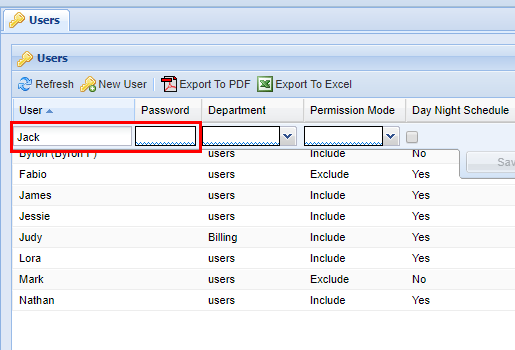
Editing Pre-Existing Entries
If you wish to edit a pre-existing entry within the web portal you simply need to click the row you wish to edit.
Form Validation
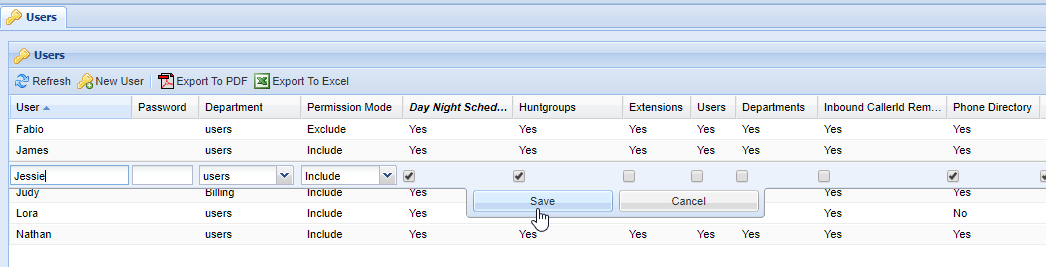
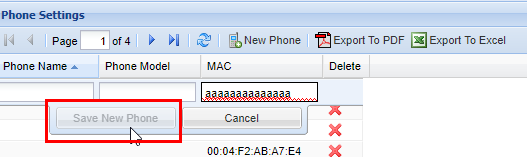
When editing or adding data in forms you will often notice at the bottom of the individual boxes that a squiggle line may span the entirety of the box. In the example below, you will see blue squiggles at the bottom of each box. This indicates that these fields are required.


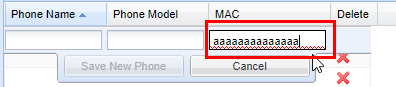
In the following example, you will see red squiggles in the field under the column MAC, this indicates that the entry submitted is invalid, and must be corrected. The web portal will not allow you to save until all fields with a red squiggle are corrected. 
In the example below, you will see a field under the column Description without squiggles, this indicates that the field is optional and does not require an entry.

Since the MAC field is not valid, the web portal is smart and will not allow you to save data. The same goes for mandatory fields that have a blue squiggle underlining them. This is to prevent the saving of any invalid data that could potentially cause a system to not function properly.
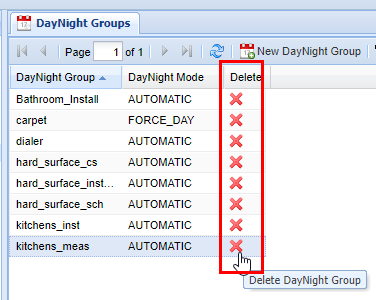
Deleting data
Generally speaking in almost all parts of the web portal you have the ability to delete individual data/records by clicking on a red X located on the far right-hand side of a screen (you may have to scroll) in an action column.
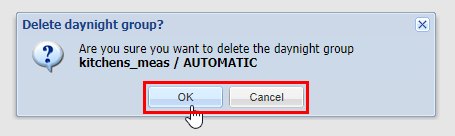
Whenever you delete data, a pop-up will appear graying out the web portal behind giving you the option to confirm, You will always see the option of OK, which will delete the entry and then save (followed by the Save Changes message), or Cancel, which will remove the pop-up and not change anything. It can always be assumed by clicking OK you are removing the data in question permanently, so when wondering about what things should be removed, contact your system administrator.
After clicking "OK", your data is permanently deleted.
Saving Data
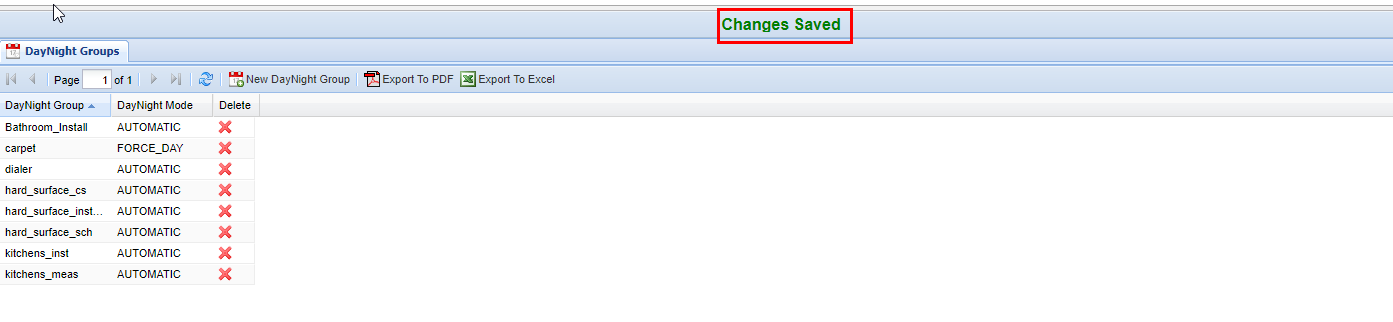
Anytime you complete an action such as inserting, updating, or deleting records, a green confirmation saying Changes Saved will always show if the settings have been saved successfully. This confirmation appears at the top center of the IntellaSoft Web Portal. If it doesn't display after a modification, double-check for errors and if you still have difficulties, consult with this documentation or lastly your system administrator for proper escalation.

No comments to display
No comments to display