Agent Editor
Overview
The Agent Editor screen is for adding and managing login credentials for Agents. An Agent is a special account on the system specifically for IntellaQueue tracking and usage.
Each Agent requires an available license in order to be created.
Even though Agent logins are not bound to a particular device or extension, the device that they use must be set to allow agent logins for IntellaQueue, or they will be disallowed from doing so even with a proper agent license.
Adding a New Agent
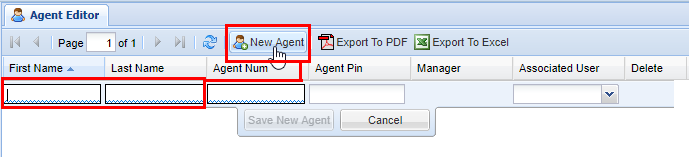
1) Click the New Agent button and fill out the various fields for the Agent:
- Keep in mind Agent Num and (optional) Agent Pin are number-only fields
- The Associated User field will list all of the users available
- Multiple Agents can be associated with the same user if that Agent has multiple phones
- As part of the [development road map: new Agent Device handling] will take care of Agents that have multiple phones to no longer need multiple Agent logins.
| Field |
Type |
Description |
|
| Required | First Name | Text | For new Agent |
| Last Name | Text | For new Agent | |
| Agent Num | Numeric | Number that the Agent will be using to login | |
| Optional | Pin | Numeric | Security pin for Agent login, recommended to prevent people logging in using the wrong agent number |
| Associated User | List |
The Agent's own web portal user account. This is used for reporting purposes and only if Agents are not hot-desking
|
|
| View Only | Manager | Boolean |
If Yes, then the [Agent Toolbar] has extended capabilities including:
Use the [License Manager] to set which Agents have Manager status. |
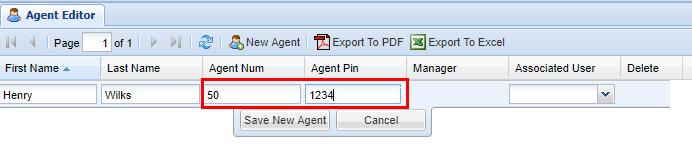
2) Next select an Agent Num and an Agent Pin (optional).
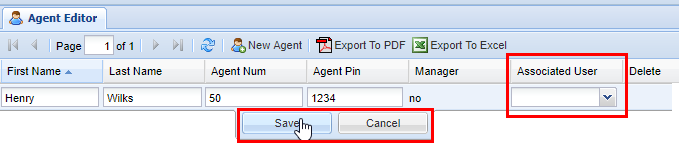
3) Lastly, you can associate a user account with the Agent.
4) Click the Save button. After you click save, you will see a message stating Changes Saved.
Deleting an Agent
2) Find the Agent you wish to delete, highlight it by clicking on it, and then click the red X under the Delete column.
3) A confirmation pop-up will appear confirming your selection. Click OK to confirm. You will see a message stating Changes Saved.

No comments to display
No comments to display